Reducing PCB assembly cost is a top priority for electronics developers, from hardware startups with limited budgets to established manufacturers aiming to improve margins. By optimizing design, selecting cost-effective components, and working with the right partners, you can significantly lower your PCB production and assembly expenses without compromising quality or performance.
This blog will provide a comprehensive roadmap to achieving cost savings at every stage of the PCB design and manufacturing process.
1. Optimize Your PCB Design for Cost Efficiency
Design is where cost-saving starts. Smart, efficient design directly reduces manufacturing complexity and material expenses.
1.1 Simplify the PCB Layout
Simplification not only minimizes cost but also improves reliability.
Use Single-Sided Component Placement
- Place all components on one side of the PCB to reduce assembly time.
- Single-sided placement means fewer passes through the soldering machine.
Stick to Standard Board Shapes
- Rectangular or square PCBs are easier and cheaper to fabricate.
- Irregular shapes require more complex panelization and cutting.
Minimize the Number of Layers
- Fewer layers = lower fabrication cost.
- Try to achieve signal integrity using two or four layers instead of six or more.
Reduce Board Size Where Possible
- Smaller boards use less raw material and fit into smaller enclosures.
- Watch out for trace density and thermal concerns as you shrink dimensions.
1.2 Design for Manufacturability (DFM)
Design for Manufacturability principles ensure your design aligns with the capabilities of manufacturers.
Use Standardized Components
- Avoid custom or rare parts that are expensive and slow to source.
- Choose commonly available packages like 0603 resistors or SOIC ICs.
Optimize Trace Routing
- Shorter, cleaner routes reduce interference and ease debugging.
- Avoid unnecessarily wide traces unless needed for current carrying.
Eliminate Unnecessary Features
- Features like blind/buried vias and via-in-pad add significant costs.
- Only use them if absolutely required for performance.
Follow Manufacturer Guidelines
- Each manufacturer has specific DFM rules, trace widths, spacing, drill sizes, etc.
- Sticking to their preferred specs avoids extra setup charges.
2. Choose Cost-Effective Components
Component sourcing can account for 50% or more of total PCB assembly costs.
2.1 Use Surface Mount Devices (SMDs)
SMD components are generally less expensive to install than through-hole equivalents.
Reduced Drilling Costs
- Through-hole parts require drilled holes, which add time and tooling expense.
Compatible with Automation
- SMDs can be placed quickly and accurately using pick-and-place machines.
- Manual soldering of through-hole parts increases labor cost.
Smaller Size = Smaller Boards
- Smaller parts allow for more compact PCB layouts, reducing size-based costs.
2.2 Select Readily Available Parts
Component shortages and long lead times can spike costs.
Avoid Obsolete or EOL (End of Life) Components
- These can be hard to find and may require redesigning your board later.
Buy in Bulk When Possible
- Many distributors offer tiered pricing with significant savings at higher quantities.
Use Preferred Vendor Lists
- Some manufacturers have lists of recommended parts to ensure compatibility and cost-efficiency.
Cross-Reference Alternatives
- Tools like Octopart and FindChips can help identify equivalent parts at lower prices.
3. Partner with the Right PCB Manufacturer
The right manufacturer can be the difference between smooth, affordable production and costly delays.
3.1 Evaluate Manufacturer Capabilities
Choose a manufacturer who matches your project needs.
Match Technology Requirements
- Can they support your board’s complexity? (fine pitch, high-speed design, controlled impedance?)
Assess Quality Standards
- Look for certifications such as ISO 9001, IPC-A-610, or UL recognition.
Request Prototyping Support
- Some offer low-cost prototype runs, which are great for testing designs.
3.2 Compare Costs and Lead Times
Don’t accept the first quote, comparison shopping can uncover savings.
Request Detailed Quotes
- Break down costs: tooling, setup, per-unit pricing, shipping.
Consider Setup Fees
- Some manufacturers waive setup charges for repeat or bulk orders.
Analyze Turnaround Time vs. Cost
- Faster production usually costs more, choose timelines strategically based on your project needs.
3.3 Weigh Domestic vs. Overseas Production
Overseas Manufacturing
- Often offers lower per-unit cost.
- Watch for higher shipping costs and longer delivery times.
Domestic Manufacturing
- Faster communication and shipping, easier to resolve issues.
- Better for rapid prototyping or low-volume production.
4. Streamline the Assembly Process
Even a perfect design can be costly if the assembly process is inefficient.
4.1 Provide Complete and Clear Documentation
Well-prepared files minimize errors and delays.
Comprehensive BOM
- Include part numbers, descriptions, quantity, package type, and manufacturer.
Clear Assembly Drawings
- Indicate component orientations, polarities, and placement references.
Include Pick-and-Place and Centroid Files
- These help automate the assembly process.
4.2 Use Panelization for Efficiency
Panelization allows multiple boards to be manufactured together.
Reduce Assembly Setup Time
- Machines handle a panel of PCBs in one run, saving time.
Optimize Material Usage
- Reduces waste and makes production more efficient.
5. Improve Testing and Quality Control
Catching issues early prevents expensive rework or scrap.
5.1 Design for Testability
Make it easy to test during assembly and after production.
Add Test Points
- Ensure access to critical nodes for in-circuit testing.
Use Test Fixtures if Needed
- Especially useful for larger volumes where quick, repeatable testing is needed.
Provide a Test Plan
- Include expected voltages, signal levels, and acceptance criteria.
Learn About: The Critical Methods in PCB Testing and Inspection
5.2 Minimize Rework with Better Inspection
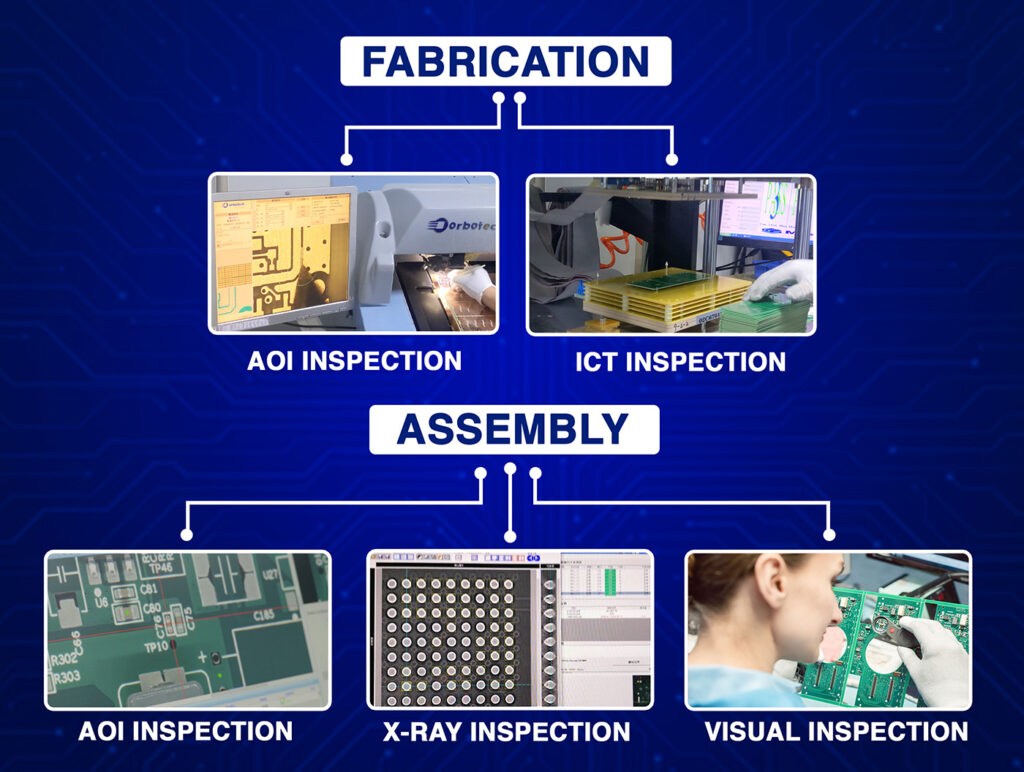
Automated Optical Inspection (AOI)
- Quickly detects missing or misaligned parts, solder bridges, etc.
X-ray Inspection
- Essential for verifying hidden joints, such as BGA packages.
Electrical Test
- Flying probe or bed-of-nails testing can confirm circuit functionality.
6. Use Low-Cost PCB Assembly Services
Small companies and makers often benefit from specialized low-cost providers.
6.1 Explore Turnkey PCB Assembly
Turnkey services handle everything from sourcing to assembly.
Save Time and Coordination Effort
- One provider handles everything, no need to manage multiple suppliers.
Cost Savings via Bundled Services
- Some providers offer discounts when you bundle fabrication and assembly.
6.2 Negotiate Pricing and Order Terms
Negotiation is key, don’t accept listed prices at face value.
Ask About Volume Discounts
- Even moderate volume orders can unlock better pricing tiers.
Discuss Payment Terms
- Net-30 or Net-60 terms may be available, improving your cash flow.
Request Price Breaks for Standard Parts
- Ask for quotes with and without alternate parts to compare cost impact.
7. Additional Cost-Saving Tips
Sometimes the smallest changes yield the biggest savings.
Use Design Reuse Where Possible
- Reuse validated circuit blocks to reduce design time and risk.
Avoid Over-Specifying
- Don’t use 1% resistors where 5% will do, precision adds cost unnecessarily.
Track Yield Rates
- Keep records of defects to find consistent problems that add rework cost.
Conclusion
Reducing PCB assembly costs is not about cutting corners, it’s about making smart, strategic choices across the design and manufacturing lifecycle. From simplifying your layout to choosing the right manufacturer, every decision has a financial impact. Use surface-mount components, design with manufacturability in mind, and ensure your documentation is flawless. Work with reputable manufacturers who align with your needs, and never underestimate the value of effective communication and negotiation.
By applying the strategies in this guide, you’ll be able to achieve low-cost PCB assembly without sacrificing quality, functionality, or reliability, keeping your project on budget and track.


